
Common Tasks for Tortoise Hg Mercurial Tool
SumamryDocuments some common tasks of TortoiseHg for source control.
Clone Repository and Sub-repository- Install Tortoise Hg. This is a Mercurial Source Control UI Tool. The installation includes Hg Mercurial.
- Go to the folder where you’ll place the new projects using the file explorer.
- In the explorer window, right click the mouse button and in the context menu, select [TortoiseHg] -> [Clone].
The “Clone” dialog box appears.

- In the “Clone” dialog box, copy and paste the source project address into the “Source” edit box. Prefix your account name so the address looks like this: https://repository_url/
- Click button [Clone].
- If successful, this should create a repository folder on your local machine and all contents are copied from the server.
- To add a sub-repository, clone the sub-repository into the main repository folder. Then create a file “.hgsub” in the main repository folder. The file should contain one line for each sub-repository, for example, SubRepoName = https://sub-repos_url
- Add contents to your cloned folder. Add your project contents: class libraries, application, files etc. Or simply copy existiong contents to the repository folder.
- To push the new files to the server, go to the local root folder of the repository and follow the instructions
in the following diagram.
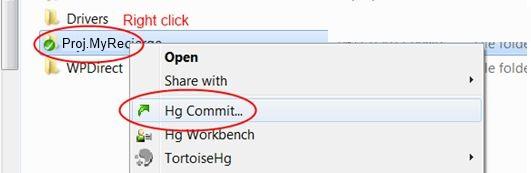
- In the commit window, tick files you want to copy to the server. Do not tick files like .obj, .dll ect. Thee click [Commit] button
- The above 2 steps add the files to the repository, but not pushed to the server. To push the files
to the server, open Tortoise Hg Workbench. Click [File] -> [Open repository] -> Select repo folder ->
click
 .
. - Now check on the server to see if the files are there.
- Start HG Workbench, click the repository to merge
- Select [Pull incoming changes from selected URL]
- If you have any local changes, select [Merge]
- Select [Update]